Category Archives: DIY

Woodworking Router Overview

The woodworking router is a very simple tool. Nowadays the word router is mostly associated with the Internet but routers have been used for a long time in woodworking. It is maybe the most versatile woodworking tool, it can do almost any kind of wood cutting and shaping.

The router is generally handheld and passed over the piece of wood but it is also possible to use the router as a stationary tool by mounting it upside down to a table. The first handheld router was invented back in 1915 and the plunge router was invented in Germany towards the end of the 1940s.
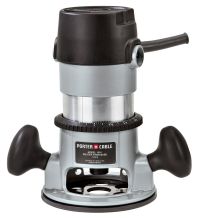
porter-cable router

Despite that the router is a very simple tool, it is a versatile tool which can be used for a number of different tasks. Routers typically have a small motor, only one to three HP that deliver from 10,000 RPM and upwards. The motor drives a collet that can be fitted with various bits. The bit, also called cutter, determines what kind of tasks the router can perform. The motor is encapsulated in the router base. The router base has two handles so it can be operated by holding the handles and guiding the bit across the workpiece.

Routers are divided into two main groups, fixed base and plunge base routers. When you use a fixed base router, you set the depth of the cut before you start to use the router and the motor will stay the same distance from the wood during the cut. A plunge base on the other hand, allows you to alter the depth of the cut during the operation. You can lower or raise the motor in a controlled manner.

The collet of the router is similar to a drill’s chuck, it holds the round shank of the router bit. Typically, the diameter of the shank of the router bits is either a quarter of an inch or half an inch. But you can also find some router bits with 3/8 inch diameter. Router bits are generally made of high speed steel. But carbide tipped HSS bits are also used, they last 15-20 times longer than HSS bits.

Although routers are simple devices, the high speed of the motor complicates things. Drill bits for example, don’t need to be perfectly concentric, the drill speed is not fast enough to create problems. The high speed of a router on the other hand means that the slightest imbalance in the bit will make the router vibrate vociferously. Note that you also must keep the collet and its socket clean. Any sawdust, rust or grit will create problems.
Veneering Overview

Veneering is a relatively simple and cheap way of getting impressive looking results. Veneering was used already in the ancient Egypt. Some of the most beautiful examples of veneering can be seen in the baroque and rococo furniture made during the Renaissance. But veneering is still used today and if you are into woodworking, you can save a lot of money by learning veneering.

Veneering means that you use cheap wood and cover the visible parts with a thin layer of veneer. This makes it possible to create impressive looking furniture and other items without spending a lot of money.

There are a number of different veneering methods, some of them require very expensive equipment but it is also possible to use cheap and simple tools and still get good results. Veneer is available in a lot of different materials, some of them are thinner than 1/100 of an inch. Since veneer is thin, a lot of a log can be used and very little wood is wasted. Another advantage of veneering is that generally the best logs are used to create veneer.

Logs are cut into veneer using three different methods, flat slicing, rotary cutting and saw cutting. Wide veneer is typically created using rotary cut while long pieces are best made using flat slicing. Saw cutting is not as efficient as the other two methods but is used for irregularly grained and dense woods.

There are a lot of ways of applying veneer. Using a mechanical or hydraulic pressure for applying veneer is the best solution for workshops but such presses are too large and expensive for home use. For smaller panels, veneer clamps can be used together with cold press veneer glue.

Hammer veneering is the classic way of applying veneer. A veneer hammer is used to press the veneer sheets into their place. Hide glue which is heat sensitive is used to keep the veneer sheets in place. One advantage is that the glue can be re-heated to correct any mistakes. This method has been used for thousands of years so it is safe to say that it has passed the test of time.

Instead of using glue, you can use contact cement or paper-backed veneer (also called peel and stick veneers) but note that you can not re-position the veneer afterwards so make sure that you get into the right place.

Whatever method you are using to apply the veneer, you need to trim and cut the veneer sheets. A veneer saw is used for this, it has a curved blade and an offset handle. If you are applying more than one sheet of veneer to a panel, tape them together using special veneer tape and before gluing them together onto the panel.

Drilling Basics

A modern drill is a very versatile tool. A drill with a reversible motor and variable speed can be used as a screwdriver. A hammer drill has an additional hammering action which is handy when drilling in hard materials. Thanks to lower prices and improved batteries, cordless drills have become very popular. Many drills have handy features such as keyless chuck, making it quick and easy to change bits, and built-in LED light which is convenient when working in dark places.

But even if you are using a good drill, you need to know a little bit about how to drill. Power tools are very good but they can also do a lot of damage if wrongly used. But first you need to use the right drill bit. A set of good drill bits is important for good results. Fortunately, for most materials inexpensive drill bits will be good enough.

For DIY drilling around the house, standard twist bits made of high speed steel (HSS) will be the best solution. HSS bits are cheap and can be used for both wood and metal drilling. If you are going to drill through steel, HSS bits with titanium oxide coating, often called titanium bits, are the best solution. Note that while normal HSS bits can be sharpened HSS bits with titanium coating can’t. Concrete and bricks require special masonry bits.

Good drilling technique is pretty much made up of just two things, the right speed and the right feed pressure (how much pressure one should apply). As a rule of thumb, use slow speed when drilling large holes or through hard materials. High speed should be used when drilling small holes or through soft materials.

To make sure that the hole is made in the right place, make a small indent before starting to drill. This also prevents the drill bit sliding away from the drill location. Remember also to lift the drill regularly, this clears the flutes of the bit which improves air flow and prevents the bit from getting too hot.

Drilling in wood is generally straight forward but you must be careful so that the bit does not splinter the wood when exiting the wood on the other side. The easiest way to avoid this problem is to put a piece of scrap wood behind so if splintering occurs it will be the scrap wood which is damaged.

Drilling in metal requires patience. It is not difficult but it will take time, you should drill steadily and slowly. Also beware of flying debris, hot slivers of metal can cause damage if you are not careful.

DIY Painting

Painting is one of the most common DIY tasks. Fortunately, painting is relatively easy, as long as you have the right tools and have done the right preparations.

Painting is straight-forward, if you have prepared the surface. No matter how good you are at painting or how good tools you have, a poorly prepared surface will produce a poor end result. You simply have to take the time to do the preparations before you start to paint. Unfortunately, preparing the surface is seldom fun. The good news is that if you do the preparations right, it is easy to do the painting and it will almost automatically look good.

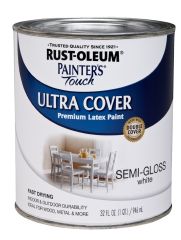
Paint Can

Obviously, how to prepare the surface will depend on what you are painting. If you are painting wood, a sander will save you a lot of time. A random orbit sander is a very versatile sander which is easy to operate. They are also reasonably priced so if you are going to paint a lot of wood, a sander is a good investment. Concrete and masonry are fastest cleaned using a pressure washer. It is not easy to find a cheap and good pressure washer but a pressure washer is handy for a lot of tasks around the house so it can be worth paying a little bit extra in order to get a good pressure washer. To get rid of dirt such as grime and dust, a mixture of trisodium phosphate (TSP) and water is generally the best solution. Use caulk to get rid of cracks.

Before you start to paint you need to tape. Put painter’s tape around everything you need to protect from paint, for example window and door frames, and electrical switches. Floors and furniture are best protected with dust sheets.

There are lot of different types of paints to choose from. The two most basic categories are exterior paints and interior paints. Like the names imply, exterior paints are used outdoors while interior paints are for indoor use. For painting indoor ceilings and walls, latex paint (known as emulsion paint in the UK) is the best type of paint. It is possible to use exterior paint indoors but most of them are not designed to withstand scrubbing.

A few accessories make the painting more comfortable. A breathing mask prevents dust and fumes from reaching your lungs. A painter’s cap protects your hair and head if you are painting ceilings. Goggles are seldom necessary for painting but can be useful when preparing the surface for the paint. A sturdy stepladder is needed if you are painting ceilings and walls.

Paint Pad

For the actual painting, you can use brushes, rollers, pads or paint sprayer. Brushes are best for small areas while rollers are best for large flat areas, such as walls and ceilings. Pads are more difficult to use than brushes but they don’t leave any brush marks.

How many coats of paint that are needed depends on the job, follow the instructions on the paint tin. Remember to always leave the paint to dry between coats. Start with painting the ceiling, then the walls and paint the woodwork last.

Sewer System Maintenance Basics

Nobody likes to work with sewer systems but you will certainly notice a sewer system problem very quickly. Few repairs are as urgent as sewer system repairs. Most people can live with a broken window pane or that a wall that needs to be repaired but virtually everyone wants plumbing issues solved as soon as possible. Here is an overview of the possible problems in the sewer system of a house.

First it is important to remember that every plumbing fixture in a house is joined by the same drainpipe. This means that a lot of different waste is going through the same pipe. A problem in one part of the sewer system could quickly spread to the whole sewer system. The sewer system in a house is very simple, in essence it made up just a few basic building blocks.

Every plumbing fixture has a p-trap, its role is to prevent sewer gases from passing back into the house. At the same time, it allows water and waste to enter the sewer system. Most p-traps look like U but if you take into account the pipe that connects it to the drain pipe and turn it 90 degrees anti-clockwise it looks like a P. The water that is trapped in the p-trap seals off the off the pipe for gases.

The waste pipes carry away the waste water from your plumbing fixtures. Vent pipes travel upwards, through the roof. Their task is to remove or exhaust sewer gases. Note that local building codes typically regulate what materials are allowed for drain and waste pipes.

You avoid a lot of potential problems by paying attention to what goes down the drain. Cooking grease for example can over time cause blockage, which will be very difficult to get rid of. A drain screen is a cheap way of preventing larger pieces to enter the plumbing system.

A garbage disposal grinds food scraps into small particles so that they can pass through the plumbing system without causing any clogs. That is how they work in theory but you should still pay attention to what you feed your garbage disposal. Also, always use plenty of hot water to make sure that oil and similar material move done the plumbing system rather than getting stuck in the p-trap.

Nowadays you have plenty of commercial drain cleaners to choose from. Most of them work reasonably well. But be sure to follow the instructions and don’t use them unless necessary. The chemicals could damage the pipes if used in larger quantities.

Knowing how to use a plumber’s auger can save you a lot of money. The plumber’s auger is used through the clean-out port which provides easy access to the inside of the waste pipes.

Unfortunately, also blocked vent pipes can cause problems. Generally, vent pipes are best cleaned from the roof. This can be both difficult and dangerous so once again, prevention is the recommended strategy.

The p-trap is very important part of the sewer system. Unfortunately, it can also create problems. The p-trap can collect a lot of various stuff which starts to clog it.

Drill Bit Overview

A good drill is important but you also need good drill bits. It can be tough to find the right drill bits, they come in all possible shapes and forms.

The most common types of drill bits are
– Twist bit, used for drilling in wood and light metal
– Brad point bit, used for wood drilling
– Spade bit, used for large holes in wood
– Auger bit, used for wood drilling
– Forstner bit, used for flat bottomed holes in wood
– Masonry bit, used for drilling in masonry, typically using a hammer drill
– Glass bit, used for drilling in glass or tile.

There are a lot of other drill bits but the standard twist bit is used for most DIY tasks. The material the drill bit is made of is very important. The cheapest drill bits are made of steel. Low carbon steel bits are cheap but should only be used for drilling in wood, preferably only softwood. High carbon bits are more expensive but can be used for drilling in metal and hardwood. But they dull quickly and need to be sharpened frequently.

High Speed Steel (HSS) is the most popular material for drill bits. It is a special kind of tool steel that can withstand high temperatures. HSS drill bits can be used at higher speed than bits made of high carbon steel. HSS drills are also available with various coating materials.

HSS bits are often coated with black oxide. It is a cheap coating which provides a higher level of heat resistance and improved lubrication. Titanium nitride coated HSS bits are not much more expensive than normal HSS bits but thanks to the coating the lifetime of the bit is increased up to five times. The titanium nitride coating also allows for higher drilling speeds. The same goes for titanium aluminum nitride coated HSS bits.

Carbide tipped HSS bits are expensive but stay sharp longer than titanium coated bits. They also tolerate heat better other drill bits but they are brittle and must be handled carefully.

Cobalt drill bits are extremely hard and used for drilling in hard materials such as stainless steel. Cobalt bits are very heat tolerant but also very brittle. Many other materials are also used for specialized drill bits but they are typically expensive and need to be handled with care. For basic DIY tasks, HSS drill bits with black oxide coating for wood drilling and titanium nitride coated HSS bits will be good enough.

Regardless of what kind of drill bit you are using, the same rules of thumb apply. When drilling in hard materials, use slow speed. When drilling in soft materials, use fast speed. Also, remember to check the recommendations from the drill manufacturer.

Battery Overview

Thanks to improved batteries, cordless power tools have become really powerful. At the same time, the prices have come down. Not only have batteries become more powerful but they can hold a charge longer. Thanks to rapid chargers, it is possible to work non-stop, except for time it takes to change batteries, with just two batteries.

Not all batteries are created equal and prices vary a lot. Batteries are often rated according to Ah, amp-hour. But actually Ah is not especially interesting. Ah measures how much energy can be stored in a battery. Ah is simply the current, in ampere, multiplied with the time of discharge, measured in hours. A battery rated at 20 Ah delivers, in theory, 1A for 20 hours before it is completely discharged.

There are three main types of batteries in use today:
– Nickel cadmium (NiCad)
– Nickel metal hydride (NiMH)
– Lithium-ion (Li-Ion)

Nickel cadmium batteries are the oldest, developed already back in 1899. NiCad batteries are still used today. The nominal cell voltage is 1.2V and they can be charge more than 1,000 times. The main advantage of NiCad batteries is that they are relatively cheap. Additionally, they can be charged quickly, although not as quickly as Li-Ion batteries. Ni-Cad batteries are also less sensitive to temperature than NiMH. The latter means that they can be used in both cold and hot environments. But if the battery itself becomes hot, charging can become a problem. The main drawback is that they are toxic. Cadmium is a heavy metal that needs to be recycled properly. Ni-Cad batteries also suffer from memory effect problems and will self-discharge about 10% per month.

Nickel Metal Hydride batteries are newer than NiCad batteries. They have the same nominal cell voltage as NiCad batteries, 1.2V. Compared with NiCad they have higher capacity and are less toxic. NiMH batteries have memory effect problems but less so than NiCad batteries. NiMH batteries can not be recharged as many times as Ni-Cad batteries, generally up to 1,000 times. They also have higher self-discharge than NiCad and lithium-ion batteries. The self-discharge is generally 30% per month or more, compared to 10% for Ni-Cad batteries and between 5-10% for lithium-ion batteries. Lately, NiMH batteries have had trouble competing with lithium-ion batteries.

Commercial lithium-ion batteries were introduced in 1991. Nowadays lithium-ion batteries are used a lot in consumer electronics. Lithium is light-weight and possesses very good electrochemical characteristics. But it is an unstable metal, for safety reasons pure lithium is not used in batteries. For most purposes, Li-Ion batteries are the best but also the most expensive. They have the highest capacity, are light-weight, no memory effect and low self-discharge rate. The life time of Li-ion batteries is about three to five years, regardless of how much they are utilized. As expected, most high-end tools are using Li-Ion batteries. If you are going to use your cordless tool a lot, paying extra for the powerful but light-weight Li-Ion batteries is well worth considering. The Li-Ion batteries are also considered to be environmentally safe.

Corded Drill or Cordless Drill

Nowadays, cordless drills are more popular than corded drills. There are several reasons why corded drills have had trouble competing with cordless models. But the main reason is that the batteries have become much better. The batteries have become much more powerful but also lighter, at the same the prices have gone down. But it still makes sense to buy a corded drill rather than a cordless model in some cases.

A drill is generally the first power tools people buy. It is a very useful tool for tasks around the house. Most drills are also relatively cheap. Traditionally, most people have bought corded drills. But nowadays, cordless drills are a better choice in many cases.

A corded drill has two main advantages, it is cheaper than a cordless drill and there no batteries to worry about. The hammering action of a hammer drill drains the battery quickly. Even if you are not doing heavy drilling, the battery may have discharged by itself because you haven’t used it for quite some time. If you want a powerful drill, the easy solution is to buy a corded drill.

A corded drill is a little bit lighter than a cordless drill. The extra weight of the battery is seldom seen as a large problem. But if you are going to do a lot of drilling, you may prefer a lighter drill even if it is limited by a cord.

Cordless drills are of course not limited by a cord. On the other hand, they are more expensive than corded drills. But if you are looking for something more sophisticated than the cheapest corded drills, you should consider cordless drills. Thanks to improved batteries, cordless drills have become both lighter and more powerful. At the same time prices have gone down.

Professionals often use two quick-charge batteries. The batteries can be charged within 30 minutes, making it possible to work all day, except for the time spent changing batteries.

Lithium-ion batteries are very good, both powerful and lightweight. They have only one drawback, they are expensive. Lithium-ion batteries are generally the best choice for professionals. For occasional use, Nicad batteries are often more suitable. Nicad batteries are not as powerful as Lithium-ion batteries but they are much cheaper.

If you are using your drill very seldom, you may prefer a corded drill. Battery self-discharge is still a problem, a self-discharge of about 10% per month is common. This means that if you haven’t used the drill for a while, the battery may be almost flat. Batteries also have a limited lifespan. If you buy a corded drill, you avoid all potential battery issues.

To summarize, the main reasons for buying a corded drills are
– you want a very cheap “no-frill” drill
– you need a very powerful drill
– you don’t want to worry about flat batteries

If none of the reasons above apply, a good cordless drill is worth having a closer look at. Often they can be used as screwdrivers as well, for this the drill must have a reversible motor and support slow speeds. There are a number of cordless hammer drills, which is fine as long as you are not going to use the hammering action for longer periods of time. If you don’t mind paying a little bit more, go for Lithium-ion batteries.